

Today we’re going to explain all that you need to know, to be able to create your own stone painting kits. As well as give you the important steps to be able to do it yourself.
Also we’ll share some project ideas to get those inspirational juices flowing.
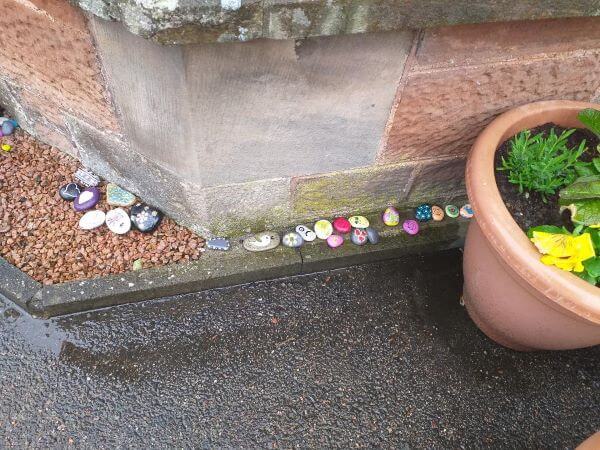
Painting stones is a fun form of art that simply does not get the credit that it deserves. Imagine a walkway in your garden, peppered with colourful stones bearing messages like ‘walk this way’ or even ‘keep off the grass” if that tickles your fancy.
What about some painted stones, suspended on the wall to hold necklaces?
It’s all about your creativity and personal expression and best of all – it’s easy and cheap to do.
Without further ado, here’s 5 things that you must know about stone painting so that you may enjoy this wonderful form of art and craft to the fullest!
What do you need for stone painting?
For your first stone painting experience you will want to gather a small collection of smooth rocks and/or stones. Once you’ve got these collected then a trip to your local art supply store is in order. Once there, you will want to obtain the following:
- Some acrylic paint
- Acrylic paint pens
- Sealer
- Sponge brushes
- A cup of soap and water
- Some cloth that you don’t mind getting dirty
- Fine sandpaper
- Some latex primer for walls

Do you need to prime stones before painting?
Priming your stones first is a good idea. You don’t have to do it, but if you do, then you’ll get stronger, bolder colours that will really stand out.
This is because the paint will bond more readily, and it will take less layering to achieve the strong colours that you want your painted stones to have.
You can use the same kind of primer that you would for painting walls and it’s fairly inexpensive at your local hardware store. It’s well worth the investment!
What paint is best to use on stones
Without a doubt, acrylic paint is the best choice when it comes to stone painting. That said, there are 3 types of acrylics that are considered superior for stone painting. They are as follows:
- Craft acrylic paint – Craft acrylics look good, but you may need a few extra coats to get the look that you are going for. Their chief advantage is the wide range of colours in which they are available.
- Multi-surface acrylic paint – Multi-surface acrylics have the nice bonus of not requiring a sealer. That said, they can chip and crack, so don’t use them as a base coat, rather use them for small decorative flourishes on your stones.
- Outdoor-use acrylic paint – While this paint will take 1 or 2 days to cure, it’s resistant to water and inclement weather. This is ideal if you are looking to paint some stones to make, for instance, an interesting pathway in your backyard.
Which kits did I buy?
My daughter, Katie, was 7 when she went to her friends house for the afternoon and discovered stone painting. We didn’t know much about it at the time to be honest, so we did what we normally do!
We bought a cheap starter set from Amazon, mainly just to see what it was like and if she’d stick with it. Her nan bought her one as well, so we ended up with two kits. (shown below)
Not much in it really but I feel the SES one was the better of the two, so if you only plan on buying one, so that’s the one I’d go for. (She liked the wobbly eyes)
After a while when she was more experienced we started buying better quality acrylic paints from our local craft centre.
However as a starter kit, to see if your children will like stone painting, you could do a lot worse than just buy one of these to try it.***
SES Decorating Stones
SES Creative 14843 Decorating Stones.
Real stones, use the extra printed materials to make the stones even more spectacular. The wobbly eyes make them great fun for children.
Garden Stone Painting
4M Little Craft, Making Kit, Kids 8+
Paint your own rocks and show your creative side. Scatter these painted stones along the path. Great for your child’s imagination and creativity.
What do you use to seal painted stones?
A great choice for sealing painted stones is Rust-Oleum Universal Advanced Formula. It’s crystal-clear and you get a glossy shine that really helps to catch the eye.
Plus, you can simply spray it on so application is a breeze. You can use other types of sealant, however, so if you’ve got a favorite already then give it a try.
Incidentally, you can also seal your painted stones with clear nail polish in a pinch if you don’t have any sealant handy.
Some great stone painting tips and ideas
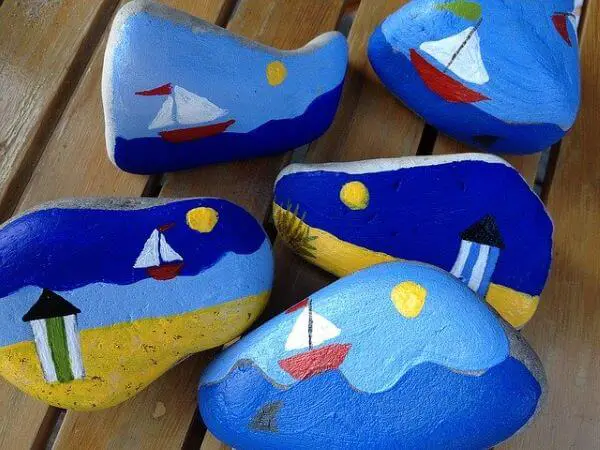
Now that you’ve got your gear and you know what kind of paint to use and the recommended sealers, we thought we might share some quick project ideas. For these examples we are going with a garden theme to keep things simple.
That said, you can certainly make other projects such as paperweights, necklace hangers, candle holders, stone animals… just use your imagination.
Marking your garden
If you like to grow vegetables or herbs, why not make some garden stones?
To do this, look for stones with shapes much like vegetables or fruits.
Long, thin stones may be painted to look like smiling carrots. Heart-shaped stones make excellent smiling strawberries. Find some round stones to make angry tomatoes.
Place the stones around the borders of your garden and it adds a sweet character that simply has to be seen and experienced firsthand to fully appreciate.
Give it a try and see for yourself!
Fairy village
If you have some larger smooth stones, then you can arrange them throughout your garden with a lovely painted theme. Create a fairy village!
To do this, simply paint a door in the front and center of a stone, along with a roof at the top of your ‘fairy house’.
Paint one or two windows and add some flowers growing in front for an extra-lovely effect.
As long as you vary the door designs and the little gardens in front you can create a convincing little village. For instance, paint flowers in front of all the houses except for one, which has 2 cacti in front and a ‘Go away’ sign in the window. You can even add a small, wooden sign that reads ‘Fairy Garden’ or paint that on a stone as well.
You get the idea! Get creative, have fun with it, and be sure to share your pictures online.
Herb garden markers
Elegant in their simplicity, painted stones for quick identification of herbs in your garden are easy to make and they also make your garden more interesting to friends. This is because they can look down and learn what each herb looks like in a way that is both educational and aesthetically pleasing.
What you want to do is to pick stones that you can stick into the ground and first paint them black and allow that paint to dry. On top of it, paint the herb it will be identifying and put the name of the herb in the bottom right-hand corner (or wherever you like, they’re your markers!).
The effect is great and it’s also a fun way to teach herb identification to your kids.
Some final words on stone painting
Now you should have all the information that you need to make your own stone painting kit and to start on projects of your own.
Remember, creativity is key, so experiment if you get bored and you’ll be amazed at what you can create.
As we said, painting stones simply does not get the credit that it deserves. So, what are you waiting for?
Put your kit together and make something beautiful today.
You’ll be happy that you did!
Affiliate Links
***This post contains some affiliate links, I paid full price when I purchased the items and the review is my honest opinion. As an Amazon associate I will earn from qualifying purchases.
Read the latest posts here:
- Bungee Workout Routine at Home
 Bungee fitness is a high-energy, low-impact workout that combines strength training, cardio, and resistance exercises using a bungee cord system. Originally popularized in fitness studios, it’s now possible to bring this fun and effective workout into your home. Whether you’re looking to lose weight, improve endurance, or simply enjoy an exciting new way to exercise, …
 - VEVICE Ring Light
 The VEVICE Ring Light continues to be a game-changer for anyone seeking professional lighting for their projects. Equipped with 184 advanced LED beads, this ring light offers 60% more brightness than traditional circle lights. With a versatile color temperature range from 3200K to 6000K and 10 adjustable brightness levels, you can easily achieve the perfect …
 - What to put on Lick Mat for Cat
 Searching for a way to amuse your cats? Wanting something to tantalize their tongues, without damaging your house? A lick mat could be the solution! Read this post to find out what’s safe to put on a lick mat for cats. Introduction Starting with the basics, using a lick mat for your cat can provide …
 - Canon TS5150 Printer Review
 I just bought this printer yesterday, so I thought I should share my initial impressions of the Canon PIXMA TS5150 3-in-1 Printer – Black Single. As a real life purchaser who actually owns and uses this printer, I want to give you a detailed review so you can make an informed decision. Pros and Cons …
 - Leotard With Built In Bra
 Are you tired of dealing with uncomfortable bras while working out or dancing? A leotard with a built-in bra might just be the solution you’ve been looking for. In this article, we’ll explore the benefits of this versatile garment, including the support and comfort it provides, how it eliminates the need for a separate bra, …
 - Can I Run a Business from my Shed?
 So, can I run a business from my shed in 2024? Well, the simple answer is yes you can, but there are some things you must consider. There are issues that could cause you problems and may in certain circumstances, disqualify you from running a business from home. When it comes to the law the …
 - Why Are Beds So Comfortable? Unraveling the Secrets of Cozy Slumber
 As someone who knows the value of a good night’s sleep, I’ve always been fascinated by the comfort that beds provide. From plush pillows to soft sheets, there’s no denying the appeal of sinking into a cozy bed after a long day. But have you ever wondered what makes beds so comfortable? As it turns …
Why Are Beds So Comfortable? Unraveling the Secrets of Cozy Slumber Read More »
- Why is the Word Bed Shaped Like a Bed? Discover the Reason!
 Have you ever stopped to wonder why the word “bed” is shaped like the object it represents? As a professional copywriting journalist, I have always been fascinated by the relationship between word shapes and their meanings. In this article, we will explore the intriguing mystery of why the word “bed” is shaped like a bed. …
Why is the Word Bed Shaped Like a Bed? Discover the Reason! Read More »
- Do You Give Up Your Bed for Guests? Tips & Etiquette Guide
 Welcome to my guide on hosting guests in your home! One of the most common dilemmas we face when we have visitors staying over is whether or not to give up our own bed. It can be challenging to balance hospitality with personal comfort, but with the right mindset and some practical tips, you can …
Do You Give Up Your Bed for Guests? Tips & Etiquette Guide Read More »
- Can You Do Sit Ups in Bed? Discover the Answer Today!
 As someone who loves to exercise and stay fit, I’m always looking for new ways to incorporate physical activity into my daily routine. Recently, I’ve been wondering if it’s possible to do sit-ups in bed. After all, it’s comfortable and convenient, and I’m all for making exercise as accessible as possible. So, can you do …
Can You Do Sit Ups in Bed? Discover the Answer Today! Read More »
- Hisense washing machine review
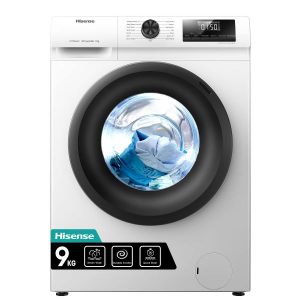 Hey there, I recently got my hands on the Hisense-WFQP9014EVM Freestanding 9 KG Front Load Washing Durable Inverter Machine and I’m excited to share my thoughts with you. This washing machine has some impressive features that make laundry day a breeze. So, let’s dive in! Pros and Cons What We Liked What Can Be Improved …
 - Shower head leaking at threads
 My leaking shower head is driving me nuts. You can see a short video of it here A leaking shower head is frustrating for anyone especially if you have it constantly dripping even when the shower isn’t in use. Fortunately for me, mine only drips when I’m actually using the shower so at least I’m …
 - What is the purpose of a desk mat?
 A desk mat protects your desk from scratches and stains, reduces noise from typing or moving objects, offers a smooth surface for comfortable writing and accurate mouse movement, and adds aesthetic appeal to your workspace. Understanding the Purpose of a Desk Mat Desk mats have tons of uses! They protect desk surfaces, muffle keyboard typing, …
 - Purple Birds Unveiled: Discovering Nature’s Purple Beauties
 Are you ready to embark on a journey into the amazing world of purple birds, where beauty and intrigue collide? We reveal the secrets of their enchanting plumage. Discover why their captivating presence is worth celebrating and preserving for generations to come. Introduction to Purple Birds Purple birds have long captivated the hearts and imaginations …
Purple Birds Unveiled: Discovering Nature’s Purple Beauties Read More »
- Limited Company Credit Cards: 9 things you need to know
 Here we look in some detail at your options when it comes to Limited Company credit cards, and LLP credit cards. We will answer the most commonly asked questions. We will cover the difference between company and personal credit cards and answer things you want to know about eligibility checks, interest free cards, using a …
Limited Company Credit Cards: 9 things you need to know Read More »
- What are the odds of a Bunk Bed breaking?
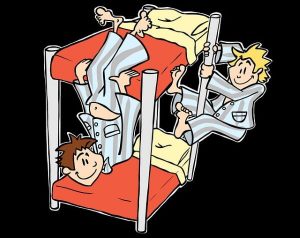 It is difficult to determine the exact odds of a bunk bed breaking because it depends on many factors. Though if used properly/sensibly then the odds are millions to one. On the other hand if you have heavy children or full grown adults bouncing around on them and treating them like a climbing frame in …
 - Best Touchscreen Winter Gloves
 The best winter touch screen gloves are designed to be worn in cold weather but still allow you to use your smartphone or tablet, while still wearing them. Let’s be honest the last thing you want to do when it’s freezing cold is take your gloves off to read or reply to a text or …
 - Best Clothes for Dog Walking
 On winter evenings when it’s dark by 5pm, and snowing outside, it’s tempting to just stay indoors and hibernate. In the summer, when it’s hot and sultry, it can be difficult to summon up the energy to go for a walk too. Unfortunately, those of us who are dog owners don’t have that luxury. After …
 - What are the best 10 types of flowers to say sorry?
 Here are 10 flowers that we recommend to give, to express apologies: Why roses are best to say sorry with Roses are a classic choice for expressing a variety of sentiments, including apologies. They are often associated with love, beauty, and passion, making them a suitable gift for expressing regret and asking for forgiveness. The …
What are the best 10 types of flowers to say sorry? Read More »
- How to Heat a Cold Kitchen
 In this article we share our best tips on how to heat a cold kitchen, with ideas and help for every budget. We also go through the most common reasons why your kitchen is cold in the first place. With peoples energy costs skyrocketing, and many struggling with the “heat or eat” dilemma, this is …
 - Electrical Safety for a Secure Home
 We depend on electricity to keep us entertained, make our lives easier and stay in touch with friends and family around the world. Still, it’s a very powerful force that shouldn’t be taken lightly. Even though modern safety regulations have helped make electricity easier to use and safer to have in the home, it can …
 - How Many Clothes Does a 7-Year-Old Need?
 Buying clothes for a child can be pretty tough. After all, they grow so quickly. No sooner have you started to put together a decent collection of outfits for them, they have suddenly outgrown them, and they need a completely new set. So, how many clothes does a 7-year-old need? In an ideal world, a …
 - Can Cavapoos Be Left Alone?
 The small and hypoallergenic Cavapoo seems like an adorable choice for a companion, but if you are someone with a busy lifestyle, you may worry about how the dog will fare when you are not home. Cavapoos can be left alone for up to 5 or 6 hours, but they can suffer from separation anxiety …
 - Is Going Hiking with a Guy a Date?
 There are many rules and conditions in dating, especially when the relationship first begins. What compounds awkwardness is when you’re on the fence with male friends. Then the lines become blurry and deciphering what constitutes a “date” can misconstrue for a hangout and vice versa. One such scenario is hiking. So, is going hiking with …
 - Credit Card FAQ’s
 Credit cards are necessary in today’s society. They help pay for things that you may be low on cash for and allow you to make purchases from a distance, such as shopping online. But, if you’re new to having a credit card, you probably have several questions about using it. The article below details some …